Before You Begin
Log into Singulate, and make sure you have DNS configuration instructions handy for your domain, because you're going to need them!
Set Up Sending with Singulate
1. First, head over to your new Singulate account and click Integrations in your left side menu.
Look for Singulate under Integrations and click Connect. You'll see this:
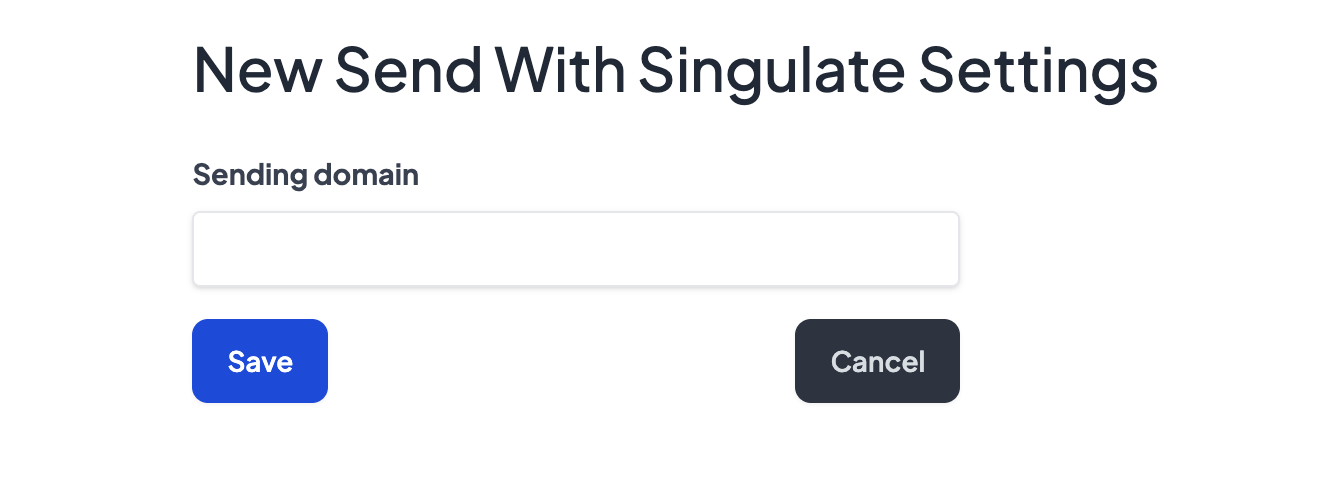
2. Enter the domain you will be sending emails from, and Singulate will generate DNS records for you to add to your domain.
3. Add the Singulate DNS records to your domain.
4. When you're done, come back to Singulate and click Verify Domain. Please note it may take several minutes DNS records to propagate, so if you’re not able to verify immediately, check back in about 15-20 minutes.
Pro Tip: If you use Squarespace for DNS or it's taking longer than 20 minutes for your site to propagate, try removing your domain name from the host value, and set a shorter TTL if possible. This may help you verify your domain faster.
5. To complete your Sending with Singulate setup, look for Domain senders and click Add Sender to create a new sender name and email:
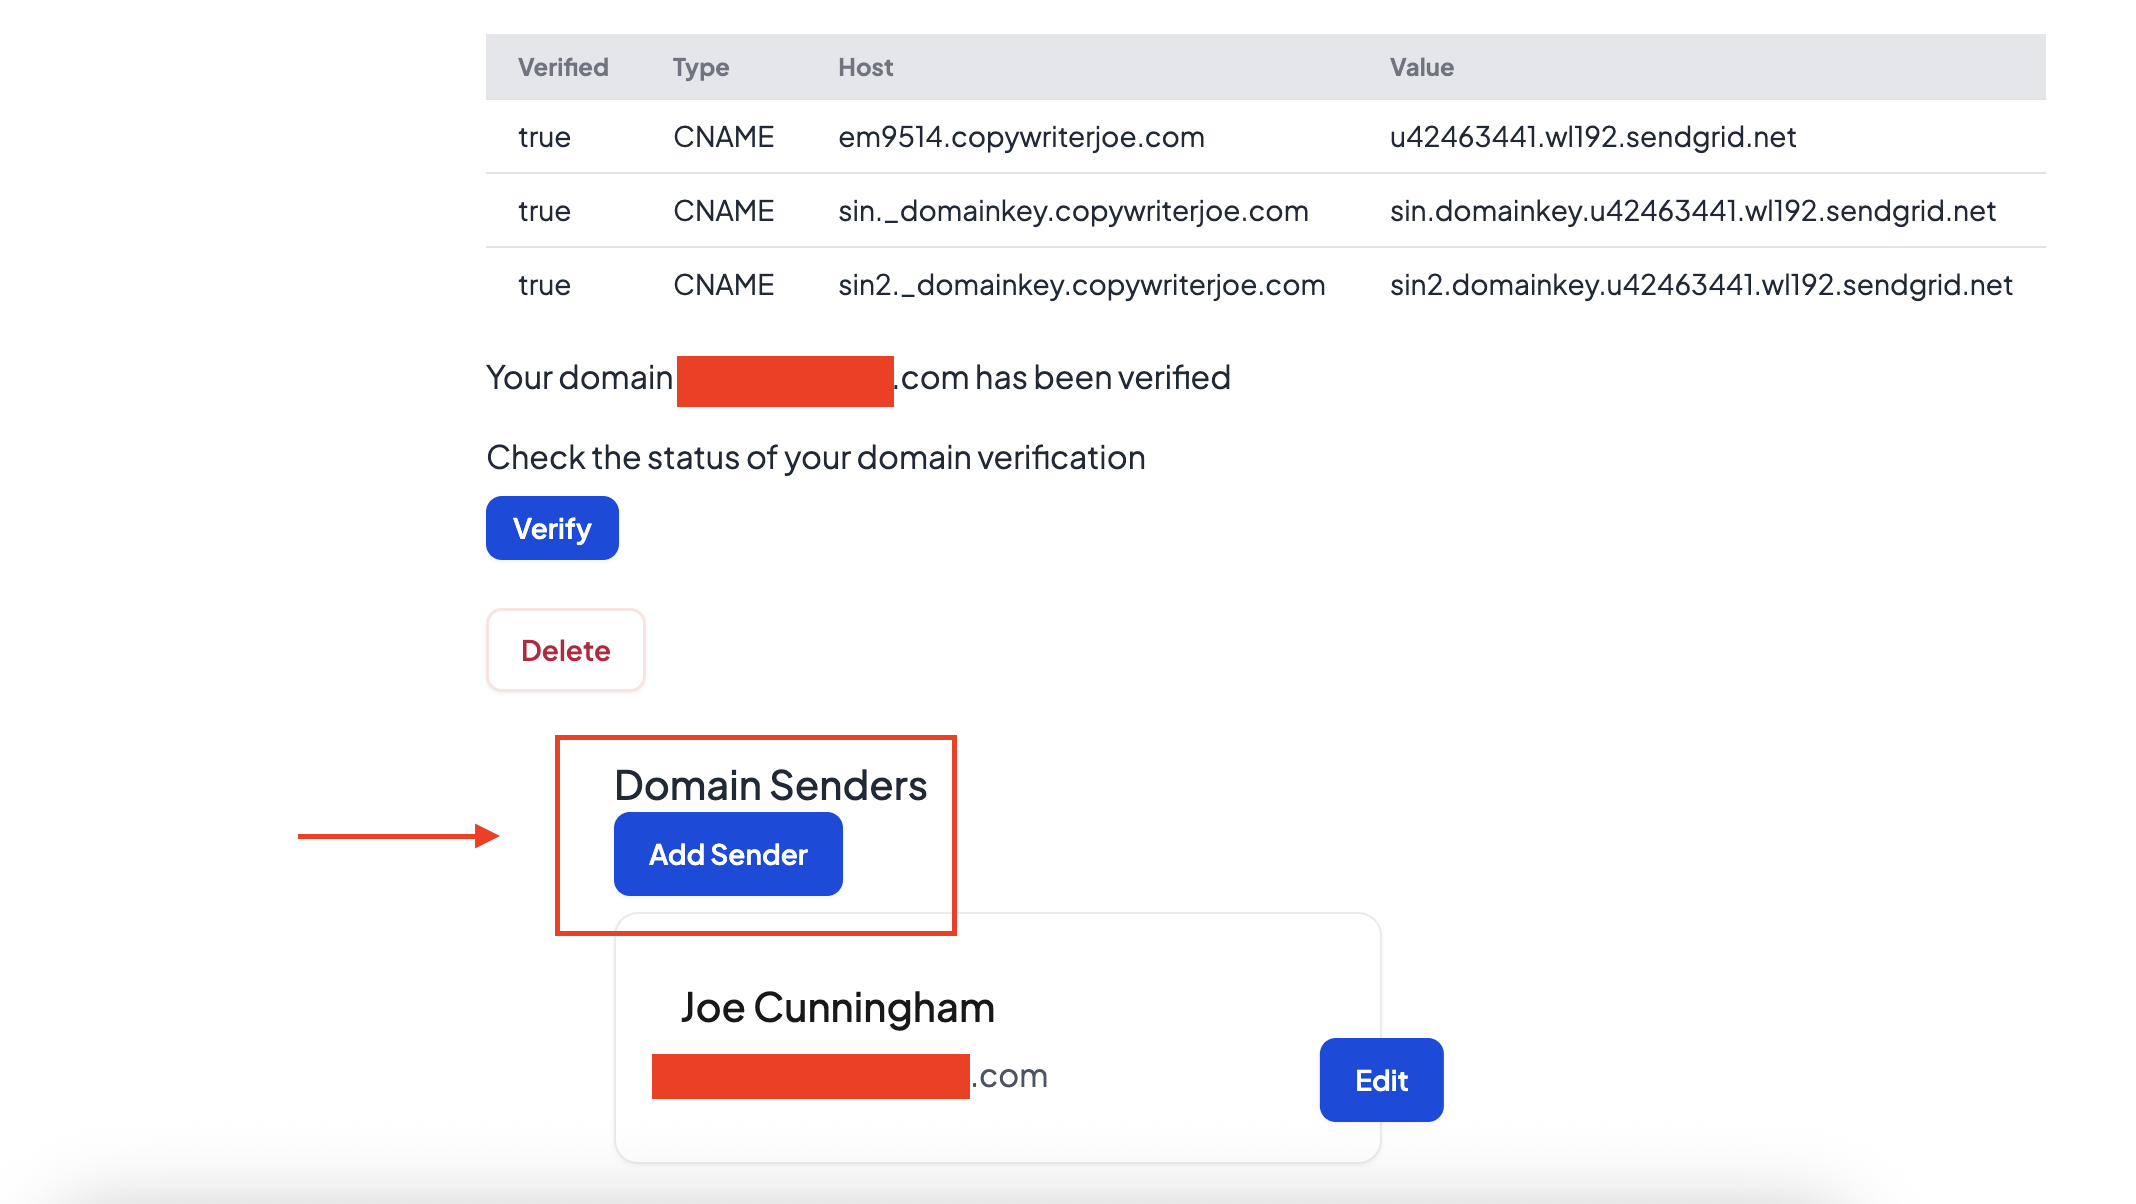
This will be the default sender for your Singulate campaigns.
And congrats, you’re all set and ready to begin sending emails with Singulate!

